TIPS & TECHNIQUES
- Details
- Category: TIPS & TECHNIQUES
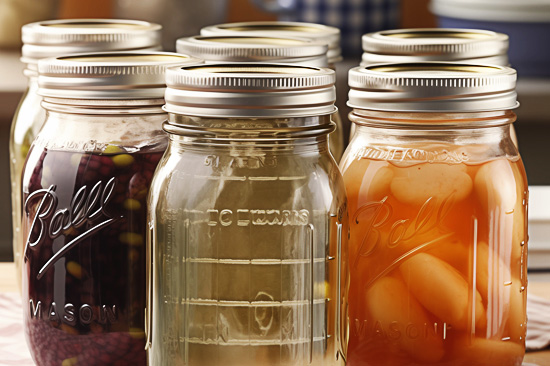
Here’s Exactly How to Sterilize Your Canning Jars
Safe canning starts with germ-free jars.
We’ve officially reached the point in summer when my garden is producing way more vegetables than we could possibly eat. I’m talking 3 or 4 pounds of cucumbers per day! Because I hate to see anything go to waste, I started learning how to preserve produce a few years ago, and now, canning is one of my favorite summertime activities. On any given weekend, you can find me pickling cucumbers, zucchini, and beets or making jam from homegrown rhubarb and peaches.
I’ll be the first to admit that canning can be a bit intimidating, as you have to follow recipes precisely and properly sterilize your equipment to ensure the food is safe to eat down the road. There’s a lot of different information online about how to sterilize canning jars, so we turned to the experts at Ball for definitive answers on how it should be done and when it’s necessary. Here’s what they told us.
Do All Canning Jars Need to Be Sterilized?
If you’re wondering whether you need to sterilize jars before filling them up with delicious preserves, the answer lies in the recipe’s processing time. “Jar sterilization is not required prior to canning unless the recipe being used has a processing time less than 10 minutes,” explains Stephen Galucki, Manager of R&D Fresh Preserving at Newell Brands. “In recipes where the processing time is 10 minutes or longer, sterilization is achieved during the food processing step.” Additionally, you don’t ever need to pre-sterilize jars if you’re pressure canning.
However, if you’re water-bath canning and the recipe will be processed for less than 10 minutes, you’ll need to sterilize your jars before filling. Even if your recipe processes for more than 10 minutes, you can still sterilize the jars if you want—it can’t hurt! I tend to sterilize mine just to be safe.
How to Sterilize Canning Jars
While you may find “hacks” online that tell you to sterilize jars in the dishwasher or microwave, there’s only one USDA-approved method for sterilizing jars. “The only way to sterilize jars is by boiling them in water for a minimum of 10 minutes at an altitude of 0 to 1,000 feet, with additional time added at higher elevations,” says Galucki.
- Gather Your Equipment
To sterilize glass canning jars, you’ll need a boiling water canner or a stockpot with a rack—the pot needs to be at least 2 inches taller than the jars you’re processing. A jar lifter will also come in handy, but a pair of kitchen tongs will work, too. - Set Up Your Pot
Place the rack inside the canning pot and arrange your jars on top of it, facing right side up. It’s important to use a rack, otherwise the bubbles that form when the water boils will cause the jars to bounce around and bang into each other, which can lead to cracks. - Cover the Jars With Water
Next, fill the pot with hot water. It’s often easiest to pour water into the jars first, then the surrounding area—otherwise, they’ll float up. You’ll want to fill the pot until the water is at least 1 inch over the top of the jars. - Process for 10 Minutes
Place your pot on the stove and turn the burner on high. Bring the water to a roiling boil and process the jars for 10 minutes to sterilize them at altitudes up to 1,000 feet. If you live at a higher altitude, you’ll need to add one additional minute for each additional 1,000 feet of elevation. - Fill Your Jars
After 10 minutes is up, your jars are sterilized—easy, right? From here, you can remove them from the water using the jar lifter, carefully dump out any water, and fill them with your processed foods. Be careful handling the jars, as they’ll be quite hot!
If you’re not quite ready to fill the jars yet, you can simply turn off the heat and leave them in the water until it’s time to fill.
Wait, What About the Lids?
Canning lids, on the other hand, should not be sterilized in boiling water. The high heat can actually harm the sealing ring on the underside of the lid, causing it not to seal properly during processing.
“Ball lids do not need to be sterilized outside of the processing time or pre-warmed prior to use,” explains Galucki. Instead, you can simply wash the lids with warm, soapy water before putting them onto the jars.
 No comments
- Details
- Category: TIPS & TECHNIQUES
5 Smarter Ways to Clean Your Kitchen, According to Pro Chefs
Expert-approved advice to make kitchen clean-up a breeze.
As much as I love to cook, cleaning my kitchen is one of my most dreaded—even feared—household tasks. It doesn’t take long for dishes to pile up, my limited pantry space is a jumble of spices and jars, and my dirty pans sit on the stove longer than I’d like to admit. I’d pretty much given up on remedying the situation—that is, until I spoke to three cooking pros about their smartest, cleverest, and most-trusted techniques for kitchen cleaning. From general words of wisdom to specific, practical tips, the advice from these chefs has reminded me that keeping my kitchen clean doesn’t have to be (such) a chore.
-
Stay Organized
You may think this goes without saying, but it’s so important that I’m saying it anyway: Staying organized is the first step to improving your kitchen clean-up process. “The biggest mistake I see home cooks make is not staying organized from the get go,” says Caroline Schiff, acclaimed pastry chef at Brooklyn’s Gage & Tollner. “The process of mise en place, which is a restaurant standard practice, keeps you neat and organized as you work,” she explains. “Starting off this way means the whole process will be more streamlined—even clean-up.”
To begin, Schiff recommends “[decanting] ingredients into clear containers,” which then get dated and labeled. “We do this in professional kitchens and it keeps you so tidy and organized, plus you can see when you're running low on an ingredient or when something might be past its prime,” she says. Schiff also recommends keeping a roll of blue painter’s tape and a permanent marker in your kitchen to make labeling a breeze.
An essential part of staying organized in the kitchen is cleaning up as you go. According to Drew Keane, chef de cuisine at Cabra Chicago, doing so “always makes the final clean-up very easy” and “[keeps] your mind focused” as you cook. Specifically, says Keane, it’s essential to “wash your tools in-between uses to prevent cross-contamination.”
-
Invest in a bench scraper
Anna Billingskog, Food52’s food stylist extraordinaire, relies on an affordable, accessible tool to make the kitchen clean-up process easier. “The bench scraper is the unsung hero of my prep and cooking zone,” Billingskog says. “It’s helpful for picking up your odds and ends [like] vegetable scraps and getting them neatly into the compost bin, or for helping pick up some finely chopped herbs off your board and getting it all into the pan at once.” Beyond being handy and efficient, bench scrapers are extremely satisfying to use—which may make you more inclined to use them for clean-up duties.
When you’re picking out a bench scraper “the less expensive [ones] work the best,” says Billingskog. Just look for something that has some slight bend in the material—that flexibility will help you pick up all of those bits and pieces left on your cutting board.
-
Use Leftover Lemons
Once you’ve used your bench scraper to remove any debris from your cutting board, this trick can help eliminate lingering odors (particularly from garlic and onion) on your board. “When a recipe calls for the juice of half a lemon, I save the other half and rub it cut side down on my board with a little kosher salt (just enough to make a paste),” Billingskog says. While the lemon deodorizes any unwanted smells, the salt scrapes off any remaining residue.
Once you’ve deodorized and scrubbed your cutting board, don’t forget to give it—and the rest of your station—a good wash, especially if you’ve been working with raw proteins. “I’d always recommend…using a different work area or separate cutting board while handling [poultry],” says Keane. Once you’re done, “wash your whole station down, then move onto your next project.”
-
Sheet Pans Are Your Friend
If you’ve ever baked a cake or fruit pie only to have it bubble over the sides of the pan and onto the bottom of your oven, this one’s for you. No matter what you’re baking—whether it’s a cake or casserole—Schiff recommends putting the dish on a parchment-lined sheet pan to catch any spills. From there, clean-up is easy: “Just toss the parchment and give [the sheet pan] a quick rinse—no scrubbing necessary,” Schiff says. “I do this at work and at home and it's so helpful.”
-
Burnt Pans *Can* Be Saved
Lastly, when disaster strikes, your pots and pans are typically not beyond repair. If you burn the bottom of a pan, according to Billingskog, it’s likely salvageable. “Boiling some water in [the pot] with a little baking soda will begin to loosen most burnt-on foods [and] stains,” she says. From there, just clean the pan as you normally would—hours of scrubbing not required.
- Details
- Category: TIPS & TECHNIQUES
The Right Way to Caramelize Onions
Because there’s no such thing as caramelized onions in under an hour.
While following a weeknight pork ragú recipe from a celebrity chef who shall remain nameless, I came across the following, offending phrase in the method:
“Cook onions until caramelized, 25 to 30 minutes.”
It doesn’t seem to matter how many articles, books, or cooking shows try to set the record straight. Even the experts among us cling to the hope that it’s possible to caramelize onions in 20 or 30 minutes, when in reality it takes about an hour to do it properly.
Perhaps we’re loath to commit so much time to an ingredient that always plays a supporting rather than starring role in recipes (unless you count this beloved braised onion pasta). Or maybe we’re playing a little fast and loose with the term “caramelize,” which at its simplest means the browning that occurs when foods containing sugar are introduced to heat. Searing sliced onions in neutral oil over high heat will indeed soften and make them deliciously brown in places in as little as 10 minutes.
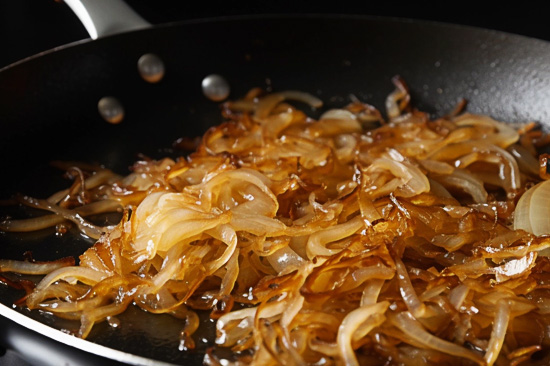
But these are not Caramelized onions with a capital C: that intoxicating, mahogany jam that lends sweetness and rich, savory depth to everything it touches. Caramelized onions are “an onion transformed,” as chef and award-winning cookbook author Tamar Adler describes them—and they’re only achieved with time, attention, and patience.
Caramelization Versus Maillard browning
Onions contain an impressive amount of sugar: some 4.7 grams (1.2 teaspoons) per medium (roughly 110-gram) onion, according to the U.S. Department of Agriculture. As food scientist and author Harold McGee writes in On Food and Cooking: The Science and Lore of the Kitchen, onions store their energy in chains of fructose sugars. Cooking them slowly for a long time breaks down these structures, coaxing out their inherent sweetness. As moisture is released—fresh onions are nearly 90 percent water—and the onion’s natural sugars slowly heat up, they caramelize, while the onion simultaneously undergoes a chemical reaction known as Maillard browning. (An important distinction: Caramelization only requires the presence of sugar, while the Maillard reaction is a chemical reaction between amino acids and sugars.)
In my experience, it takes at least 45 minutes for the onions to start to really relent, melt, and deepen in color. But if someone asks, I usually round up to an hour—or better yet, as long as they can stand to be there, babysitting a slow-cooking heap of onions.
Adler's Method
Adler sympathizes with the home cook’s hesitancy to devote so much time to such a mere component of a dish. “I found a kind of loophole in talking about how long it really takes to caramelize onions,” she says. “I wrote in my first book An Everlasting Meal: Cooking With Economy and Grace just about caramelizing onions—like, just doing that, rather than making it part of a larger dish. The way I approach it is, if you’re going to be a bear, be a grizzly bear—meaning if you’re going to take the time to caramelize onions, do enough so you have the ingredient around for a while.”
How to properly caramelize onions
This brings me to Adler’s caramelized onion recipe from An Everlasting Meal. It’s one of my favorites because it’s simple, yet just finicky enough to demand my regular attention throughout the process. Most importantly, it confidently asserts that “this will take 45 minutes to an hour.” Here’s the method:
- Cut off the tops of 8 to 10 onions, then cut them in half through their roots, then lengthwise into slices about a quarter-inch thick.
- Warm 3 tablespoons each of butter and olive oil in a big pot. When the butter is melted, add the mountain of onions, a small pinch of sugar, a big pinch of salt, and stir well.
- Cook the onions over medium-low heat, stirring occasionally. Add occasional sprinkles of water if the onions begin to stick, she continues. If they start to sizzle, lower the heat and cover the pot, then uncover it again when the cooking has slowed.
Adler tells me she prefers the biggest yellow onions she can find for this recipe to minimize peeling. She favors equal parts olive oil and butter—oil to keep the butter from burning, butter
Adding a few drops at a time lets you understand the rate at which water evaporates,” she tells me. “It’s a little absorbing lesson.”
She hadn’t tried (much less heard of) the so-called baking soda hack, in which a few pinches purportedly speed up the caramelization process to a mind-boggling 13 minutes, according to the National Onion Association’s successful attempt. Adding baking soda makes the onions more alkaline, increasing the speed of the Maillard reaction so they brown more quickly. But it also imparts a chemical-like bitterness to the end result. Adler hasn’t tried caramelizing onions in the oven on moderate heat, either (another method I unearthed that seems to work reliably well, at the expense of up to several hours).
Instead, her straightforward technique calls us to the stove with the task of observing, learning, and reacting—stirring periodically, adjusting the heat, covering and uncovering the pan, and sprinkling in water droplets if the bottom of the pan starts to burn. We can almost hear her voice in our heads as we go, reassuring us that the whole mass will look “soggy and unconvincing” right up until the onions are ready.
When the onions do finally melt into that elusive golden jam, we can keep it on hand to transform fried rice, soup, scrambled eggs and even sliced toast with broiled Gruyère and a few magical spoonfuls. Adler’s favorite method of late involves adding caramelized onions and smashed raw garlic to yogurt, which she tosses with short pasta in a nod to manti, or lamb-filled dumplings in yogurt sauce.
- Details
- Category: TIPS & TECHNIQUES
A Guide to Steak Grilling Times
Plus, tips from our Test Kitchen team.
Grilling a steak is among the most iconic summer activities, but for many, it’s also among the most daunting. There’s no worse feeling than investing in a high-quality (read: pricey) cut of meat only to find you’ve overcooked it. Add dinner guests into the mix, and what started out as a fun, warm-weather activity has turned into something far more stressful.
We’d like to help prevent that outcome. So, we asked our pros in the test kitchen to weigh in on how long to grill steak, how to test for doneness, and the differences between charcoal and gas grills.
How Long to Grill Steaks
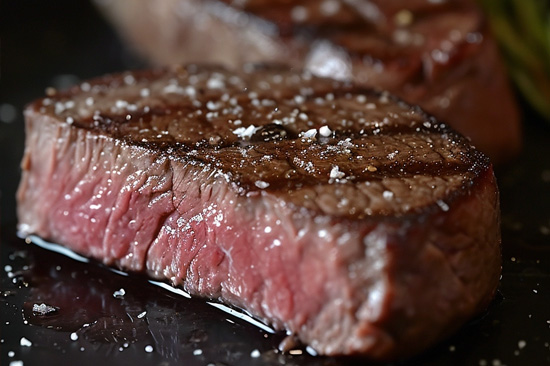
First off, it’s important to establish that grilling steak involves a lot of variables, such as the cut and thickness of your steak, the type of grill you’re using, and your personal preferred doneness. So, while we can provide you with guidance and estimates to help you make the most of your steaks, it’s important to also use your own best judgment. With that in mind, we spoke to Food52’s Food Stylist Anna Billingskog to get her go-to timing for ensuring a perfectly cooked steak every time. Her guidelines (for a 1-inch-thick steak) are as follows:
- For a rare steak (120°F to 130°F): 8 minutes on the grill, flipping halfway
- For a medium-rare steak (130°F to 135°F): 9 to 10 minutes on the grill, flipping halfway
- For a medium steak (135°F to 140°F): 10 to 12 minutes, flipping halfway
- For a medium-well steak (140°F to 150°F): 11 to 12, flipping halfway
Another resource at your disposal is your local butcher, who can give advice based on their specific offerings. “My best bet is to chat with my local butcher and ask for [cooking] times or cues from them,” says Food52’s Food Editor Emily Ziemski.
How to Test for Steak Doneness
It can be tricky to know exactly when to pull a steak from the grill. A meat thermometer, inserted into the center of the cooking steak, is a surefire way to ensure accuracy—but “pok[ing] a hole in the meat you’re cooking…can let precious juices escape,” says Anna.
Instead, she likes to rely on what’s known as the “thumb” or “finger” test for determining steak doneness: “Touch the tip of your index finger to the tip of your thumb. The fleshy area below the thumb [on the palm] should give quite a bit. This is what meat cooked to rare feels like—it gives quite a bit and isn't too springy.”
For medium-rare (which Anna says is her “ideal” level of doneness), “press the tip of your middle finger to the tip of your thumb and press the fleshy area below [the inside of] your thumb.” Gently press the surface of your steak, and see how they compare. To test for a medium and medium-well cook, repeat those steps but with your ring finger (for medium) or pinky (for medium-well).
When in doubt, Anna errs on the side of undercooking her steak—that’s because the meat will continue to cook as it rests, even after it’s been removed from the grill or pan, thanks to the residual heat.
Another tip comes from Emily. “If the meat is sticking to the grates, it's not ready to be flipped,” she says. “Letting the meat do its thing on the grill without disturbing too much will yield those beautiful grill marks [and] a more even cook overall.”
Grilling a perfect steak is as much about finesse as it is about timing. Remember, patience is key.
Grilling on Gas vs. Charcoal Grills
Both gas and charcoal grills can yield beautiful results, but each offers slightly different advantages—and challenges—for the home cook. Known for its ability to give meat (and veg!) a distinctly smoky flavor, charcoal is especially great at reaching temperature extremes, whether you’re looking for a super-hot sear (in the case of a steak) or a low, slow smolder. However, temperatures on a charcoal grill can be difficult to control and maintain. Gas grills, meanwhile, won’t necessarily give your steak that ultra-charred or smoky finish—but they’re more convenient, easier to clean, and have precise temperature controls, all which make the process run more smoothly, especially for novice grillers.
- Details
- Category: TIPS & TECHNIQUES
The Single Most Genius Thing You Can Do to a Ripe Tomato
Or Even the Not-Ripe Ones—Plus 6 Ways to Eat Them
An Introduction to Tomato Transformation
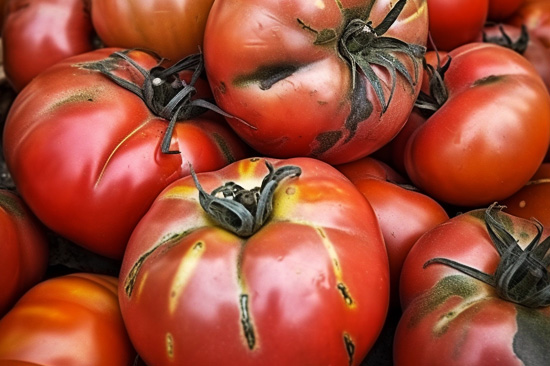
There are heaps of inarguably perfect ways to eat a ripe tomato—on plain-jane sandwich bread with a cushy swipe of mayo, blistered hot and fast in a skillet till the skins peel back and the oil swirls with juice, cherry babies squished behind your sealed lips. But the one way to make a tomato taste its most tomatoey, to become a fully actualized, out-loud version of itself, is to very verrrry slowly remove that which isn’t tomato. And the part that isn’t pulling its weight as tomato is the 94% of it that’s water.
The Tomato Transformation Technique
To quietly Hoover away that water and reveal tomatoes at their fullest potential (without overdoing it and turning them to sauce), do what Molly Wizenberg was doing a good twelve years ago on Orangette—which isn’t much: Simply halve your tomatoes, brush them with oil, dust them with salt and citrusy-spicy ground coriander, then leave them in a 200° F oven for many hours—a good four to six. (Don’t worry, this won’t noticeably warm your kitchen, and asks only that you not completely forget them in the oven.) In that time, two-thirds of their water weight will have floated into the ether, leaving behind baby-soft curls of tomato skin, cradling a condensed, jammy, electric-tomato core. They won't have gone so far as chewy, raisin-like sun-dried tomatoes—they're very much still fresh and alive, a pulpy pulse still pounding.
They’re best and most outrageous when made with ripe Romas or other meaty types, but as Wizenberg points out, slow-roasting will bring out the tomato in even the pale and off-season, if you feel the need.
6 Creative Ways to Enjoy Slow-Roasted Tomatoes
Eat them Straight
Warm from the oven. Try not to eat them all at once. I know, this one’s a freebie!
As a Topping for Eggs
After you’ve cooked your eggs, fried, scrambled, or other—revuelto-ed?—toss the tomatoes around in the still-hot pan to take the chill off, then dump over the eggs. Like the broiled tomato that comes in a full English breakfast, but punchier. (Same applies to anything else you’ve cooked in a skillet, from steak to green beans to corn cakes.)
In Salads
Slice and stir into your egg/chicken/tuna/potato/other mayo-based salad for extra pep.
Broiled with Pesto and Mozzarella
Inspired by all the time I spent at Cafe Panini in Berkeley in the 1990s: Broil with pesto and fresh mozzarella till bubbling on skinny baguette boats or other toast of choice, top with slivers of fresh basil or chives plus crunchy salt.
In Sandwiches
Tuck into your BLT or burger or grilled cheese for something that’s somewhere between fresh tomato and ketchup.
In Sauces
Blend into any sauce—vinaigrette, aioli, tartar, romesco—to make it scream tomato! without also screaming tomato water! and throwing the balance out of whack.
- Details
- Category: TIPS & TECHNIQUES
How to Use a Stainless-Steel Pan (Without Worrying Your Food Will Stick)
Stainless Steel: A Sturdy and Versatile Cookware Material
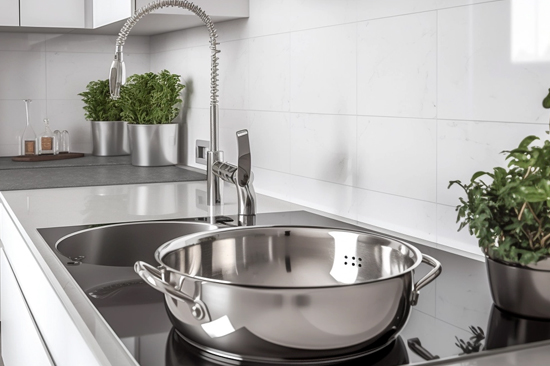
Stainless steel is sturdy, sleek, and can be used to cook pretty much anything, making it the cookware material preferred by most professionals. Unlike its nonstick counterparts (which we still love!), stainless steel can handle high temperatures and metal utensils without the risk of damage. Cast-iron pans share many of the same benefits as stainless steel, but they tend to be heavier and bulkier—not ideal for moving around small kitchens or transferring from the stove or oven and to the table.
Overcoming the Stickiness Factor
"Then why isn’t everyone cooking with stainless steel? Well, there is one main deterrent: Unlike a seasoned cast-iron skillet or ceramic-coated nonstick pan, things tend to stick in stainless steel, if used improperly. Because of that, many home cooks—especially those who are just getting comfortable in the kitchen—avoid the material entirely. We’re here to say: Don’t let that fear stop you from cooking with stainless steel. Just follow a few key pieces of advice from the pros in our Test Kitchen, and you’ll find that cooking with these sturdy, long-lasting pans isn’t nearly as daunting as it seems."


